Showing posts with label Recipes. Show all posts

Sunday, December 19, 2010

Old School Biscuits


This week I got a little old school with a batch of biscuits.

Old school how?  For starters, I used an old recipe.  And by old I'm referring not to the age of the formula itself but rather the condition of the paper it's written on.  I transcribed it from my mother's version some twenty years ago when I was first teaching myself to cook and trying to learn some of her stand-by recipes.  This is one recipe that has been put to very good use.

The Recipe
But, age of the paper aside, I've actually gone more old school with this batch than I have in the past, and that's because just a few days ago I received my order from Columbia's Anson Mills and it included their Colonial Style Whole-Grain Wheat Flour.  This is flour the way it used to be made before the era of the iron-roller mills.  It's made from whole grains of Red May wheat, which you can tell right away from not just the coarser texture but also the little dark flecks scattered throughout it, which are the bran.

Anson Mills' Colonial-Style Red May Wheat Flour
I figured such old-school flour needed something a little better than plain old supermarket buttermilk, so I splurged for a bottle of buttermilk from Homestead Creamy.  Their milk comes from just two farms--their own in Wirtz, Virgnia, and a neighbor's.  It's bottled in real, old school glass bottles, and if you live in Roanoke, they'll deliver it to an insulated milk box on your doorstep via their old-fashioned milk delivery service.  (Being a bit outside their delivery area, I picked up my bottle at Earthfare.)

Good buttermilk
It's remarkable stuff: very, very thick and creamy.  In fact, it's much more like good yogurt in texture and flavor than the regular buttermilk you get at the supermarket.  (As a side note, it is still cultured buttermilk, meaning that it is regular milk with bacteria added to create the lactic acid that gives buttermilk it's distinctive sour edge--much the way yogurt is made.  True old-school buttermilk is the thin stuff left over after butter is churned.  I am hot on the heels of acquiring myself a bottle of that, but that's another story altogether.)

Here's the recipe.


Biscuits

2 cups flour
1 T baking powder
1/2 t salt
1/4 t baking soda
1/3 cup of cold butter
3/4 cup of buttermilk


First, combine the flour, baking powder, salt, and baking soda in a large bowl and mix together.  Next, cut in the butter.  There are several ways you can do this.  You could use a pastry blender (like this one), which is a handy little device with five or six parallel metal blades  that chop up the butter and mix it in with the flour.  By all accounts they work well, but I've never tried it: I just cut the butter in by hand.  To do so, I take the cold butter and chop it into small cubes, then toss them in the bowl with the flour.  I cover the butter lumps with flour and squeeze them between my fingers to break them down into smaller bits and rub the butter into them.  You just squeeze and rub, squeeze and rub until all the butter is blended in and your left with a bowl of what looks like bread crumbs.

Important: You want to make sure the butter is cold; otherwise, it will just mix in with the flour.   You want those little lumps: those are what make the biscuits flaky in the end.

Finally, stir in the buttermilk and mix up the dough until the liquid is all absorbed by the flour.  With your hands, knead and shape the dough until all the flour is worked in and the dough is of a single consistency.  It should be still be slightly sticky to the touch, but not so sticky that it clings tou your hands and the side of the bowl.  Now you're ready to roll out the biscuits.


Dough rolled out and ready for cutting


Sprinkle a little flour across a cutting board (or you could do this right on the kitchen counter), turn the dough out on it, and knead it up and down on the board, sprinkling on a little more flour if it seems too sticky.  Roll out the dough on the board with a rolling pin (I rub mine down with a little flour to keep the dough from sticking) until it's between a half-inch and an inch thick.  How thick you like your biscuits is a personal preference.  I tend to make my a little thinner--probably a half inch thick when rolled out.

To cut the biscuits, you could use a biscuit cutter if you have one.  Or, just do what I do and use a plastic cup of the desired diameter.   This again is a matter of personal preference.  Lately, I've been making them several inches in diameter, which is perfect for slathering with jelly and having for breakfast.  If you're going to use them for other purposes, though (like topping them with ham and pimento cheese for a tasty appetizers) you could make them even smaller.


Ready for the oven

Place the biscuits on a greased or non-stick baking pan and bake in a 450 degree oven till brown and crispy around the edges.  My old handwritten recipes says to start checking the biscuits at 8 minutes and every two minutes after that.  For this batch, it took me a full twelve minutes to get them fully done; smaller cut biscuits will likely take closer to eight minutes.

Remove from the oven and let cool on a wire rack, though in practice you can eat one as soon as it's cool enough to hold, and half of this pan disappeared within five minutes of its being out of the oven.

This recipe would work just fine with regular old all purpose flour and cultured buttermilk,  But, the Anson Mills flour makes an remarkable difference.  The biscuits turned out a light brown color reminiscent of good whole wheat bread.  And, the flavor of the old-fashioned flour is stunning.  The biscuits are notably crispier than ones made with regular all-purpose flour, and there's a good, solid body to them.  Little flecks of bran remain in the biscuit, too, giving it a touch of a grittiness to some of the bits that is unusual but not at all unpleasant--a lot like stoneground grits, in fact.  The bottoms of the biscuit get a nice dark brown and crispy, too.

To serve, I simply sliced them in half and spread on a little butter and some good strawberry preserves.  A perfect breakfast.


Sunday, December 12, 2010

Cornbread with a Side of Controvery

Cornbread is a long-standing and genuine Southern staple.  Unlike pimento cheese or fried green tomatoes, which were never served in the South Carolina home of my boyhood, cornbread is something that we ate on a regular basis and thus is for me a nostalgic, homey comfort food.  It's also really, really good.

This recipe is my paternal grandmother's, which she wrote down and gave to my mother not long after she and my father got married, and my mother, in turn, wrote down for me at my request when I got really interested in cooking in my early 20s.

For the bread to turn out properly, you really have to cook it in a cast iron skillet.  I have an 8-inch one that's just the right size--a Lodge pan that I bought at Hiller's Hardware in downtown Columbia and seasoned myself back when I was in graduate school.  I suppose you could make this same recipe in a regular old baking pan, but you would miss out on the very best feature of cornbread: that crisp, firm quarter-inch of dark brown crust that's created from the heat of the iron pan.


Grandmother Moss's Cornbread (With a few Small Enhancements)

1 cup cornmeal
1/2 t baking soda
1 t baking powder
1/2 t salt
1 cup buttermilk
1 egg
3 T vegetable oil (to go in the batter)
1 T of butter (for greasing the skillet)

Optional enhancements:
1/4 cup finely chopped onion
about 12 pickled jalapeno rings, chopped

To begin, you have to preheat both the oven and the skillet.  I can't emphasize this step enough because if you start with the batter in a cold pan you won't get the same crust and it will stick to the pan instead of popping right out when it's finished (and leave you with an ugly, ripped up top to your cornbread).  So, turn the oven to 400 degrees and put the empty cast iron skillet inside so that it preheats along with the oven while you are mixing the ingredients.

Next, make the batter.  Not much to it: put all the dry ingredients (the first four) in a mixing bowl and stir them together.  Put the buttermilk,  the egg, and the vegetable oil in a separate container (I use my glass measuring cup) and mix them with a fork until the egg yolk is broken up and mixed in.  Then, pour all of the liquid into the mixing bowl with the dry ingredients and stir until it is all mixed in and of a smooth consistency, but don't over mix it.  Finally, add whatever optional enhancements that you like (such as the onions and pickled jalapenos that I usually add).

Once the oven is heated and the iron pan is good and smoking hot, remove it from the oven to the stovetop (you'll need a good thick oven-mitt or kitchen towel since that cast iron will be HOT).  Toss a pat of butter in the pan and stir it around with a spoon till it's totally melted and coating the pan--this will both flavor the cornbread crust and help it crisp up and not stick to the pan.  Pour the batter into the skillet, return it to the oven, and bake for 25 minutes until the top is golden brown.

Now, some folks find getting the finished cornbread out of the skillet to be tricky, but it shouldn't be.  The key is to not let it cool in the pan. Here's what I do: put a plain old dinner plate on the counter, remove the skillet from the oven (again using a thick oven-mitt), and invert it over the plate.  Most of the time the cornbread will drop right out onto the plate and you're done.  If you turn the skillet upside down and the cornbread doesn't move, simply put the pan down on the stove top, get a butter knife, and run it around the inside of the pan to loosen the crust from sides of the pan.  Then invert it over the pan again and it should pop right out.  Once it's on the dinner plate, let it cool at least 10 minutes before serving.

My two standard enhancements to my grandmother's recipe are the chopped onions and jalapeno.  You can leave them out if you like, but I think they add extra moistness and flavor to the bread, and lest you're worried about the heat factor, as long as you use the pickled variety from a jar and chop them finely, the jalapenos don't make things too spicy (using chopped fresh jalapenos is a different story).


A Side Dish of Controversy: Sugar and Flour in Cornbread

Note that while I'm pretty open minded about optional enhancements--you could toss in bacon, cracklins, herbs, hot sauce, whole kernels of corn, you name it--there are two ingredients that do not and will not appear in my cornbread.  They're the kind of things that I would consider not "optional enhancements" but "flat out adulterations".  Those ingredients are wheat flour and sugar.

There's been much silly debate over whether corn bread should or should not have sugar in it.  Silly, I say, because it is so plainly self evident that corn bread could not possibly have any sugar in it for as soon as you add any you immediately transform it into cornmeal cake.  The real deal is rich, hearty, and possibly even savory, but it certainly is NOT sweet.  

The same prohibition goes for wheat flour, which only heightens the cake-like quality of adulterated corn bread.  It's also completely at odds with cornbread's history, though that's a long enough subject for a whole separate post.

I am well aware that this is just an opinion and, to judge by a cursory Internet search, one that puts me in the cranky minority.  So, I threw together a little poll and put it up in the sidebar.  Weigh in and let me know what you think.


Tuesday, December 07, 2010

"Authentic" Pimento Cheese

People get passionate about pimento cheese.  It's been called the "Pâté of the South" and "Carolina Caviar."  It's the kind of thing that Southerners get all misty eyed remembering from their youths and Yankees get all wondrous and rapturous about when they discover it.

Like other foods that stir diners' passions--barbecue, for instance--pimento cheese can also stir up a lot of disagreement.  It's the kind of thing that people quickly harden into a "my way or the highway" kind of mentality about.  In fact, every single ingredient can be debated.
Grating the Cheddar (Finely, in this case)


The base of just about every pimento cheese recipe you see today is three-part: cheese, mayonnaise, and pimentos.  But, do you use cheddar, white cheddar, Swiss, Monterrey Jack, Parmesan, cream cheese, or Velveeta (or a combination of several of these)?  Do you grate the cheese finely or leave it in  big ole chunky shreds?


The Basic Foundation: Cheese, Mayo, Pimento
You would think the pimento part would be fairly straightforward, but as I discussed a few days ago, it's not clear whether fresh or canned peppers would actually be more authentic.

And what about the mayonnaise?  Nan Davis of Oxford, Mississippi, who won the Southern Foodways Alliance's Pimento Cheese Invitational in 2003 with a recipe she learned from her Aunt Lella.  As Davis recalls that when Lella taught her the recipe, "She started with 'Well, first you make the mayonnaise'. I interrupted her and said that I was not going to make homemade mayonnaise, just to give me the proportions on the cheese, pimentos, and spices. There was a long pause and then she said 'Well, you might as well not bother'".  Davis has used homemade mayonnaise ever since.

One of my favorite pimento cheese versions of all times is that of Sarah O'Kelley of the Glass Onion here in Charleston.  The Glass Onion is a die-hard farm-to-table, fresh local ingredients kind of place, but O'Kelley is insistent on using store bought mayo for her pimento cheese.  "You must use Duke’s brand,”O'Kelley told Garden & Gun magazine.  "Duke’s has no added sugar and more egg yolks."

Ready for Sampling
I'm partial to Duke's Mayonnaise myself, perhaps in part because I grew up in Greenville, South Carolina, where Eugenia Duke first began making her no-sugar mayonnaise in 1917, and the yellow-labeled jars were omnipresent.

Once you get the first three ingredients in the mixing bowl, the concoction becomes a palette for your culinary creativity, and what each cook adds from there is what makes their "special" pimento cheese recipe so special.  Black pepper, cayenne, jalapeños, lemon juice, onion, bacon, pecans, hot sauce, garlic powder, mustard, cider vinegar, and celery seeds are just a few of the things you might see adding a little zip or kick or twist.

Or, You Could Gussy it Up a Little
When next summer rolls around I plan on going all lardcore and making my pimento cheese with fresh, fire-roasted pimentos, handcrafted hoop cheese, and homemade mayonnaise from Southern-sourced oil (maybe I'll even press it myself from locally-grown soybeans.)  Until then, here's the standby recipe I'm going with for holiday parties and other family gatherings.


Pimento Cheese


8 Oz. sharp yellow cheddar (or 4 oz. sharp cheddar and 4 oz. aged white cheddar)
1/2 cp. Duke's mayonnaise
1/2 cp. pimentos from a jar, drained and chopped into 1/4-inch bits
black pepper
pinch of salt
1/4 cp. diced green onion
1 t. dried mustard
1 t. freshly-squeeze lemon juice
1/4 tsp. cayenne


Grate the cheddar.  Lately I've been using the fine holes on my grater, but (yes, Janet) you could use the larger ones if you prefer big shreds instead.  Put the grated cheese in a large mixing bowl and stir together all the ingredients.  Start with a little less than a half cup of mayo and add a little more once you have everything else mixed in to make sure you get the right consistency--I like mine to be thick but still loose enough to spread easily, and the 1/2 cup of mayo will usually do it.   

I like to make my pimento cheese the day before I serve it so it has a good night in the fridge to let everything merge and meld together.  You can serve it immediately, though, in a pinch.

Lately, I've gone for mustard and black pepper for a little zip, cayenne to add a subtle bit of heat, and lemon juice to brighten it all up.  But, there are a hundred different things you could use instead and come up with a similarly satisfying spread, so here's your chance to get creative.

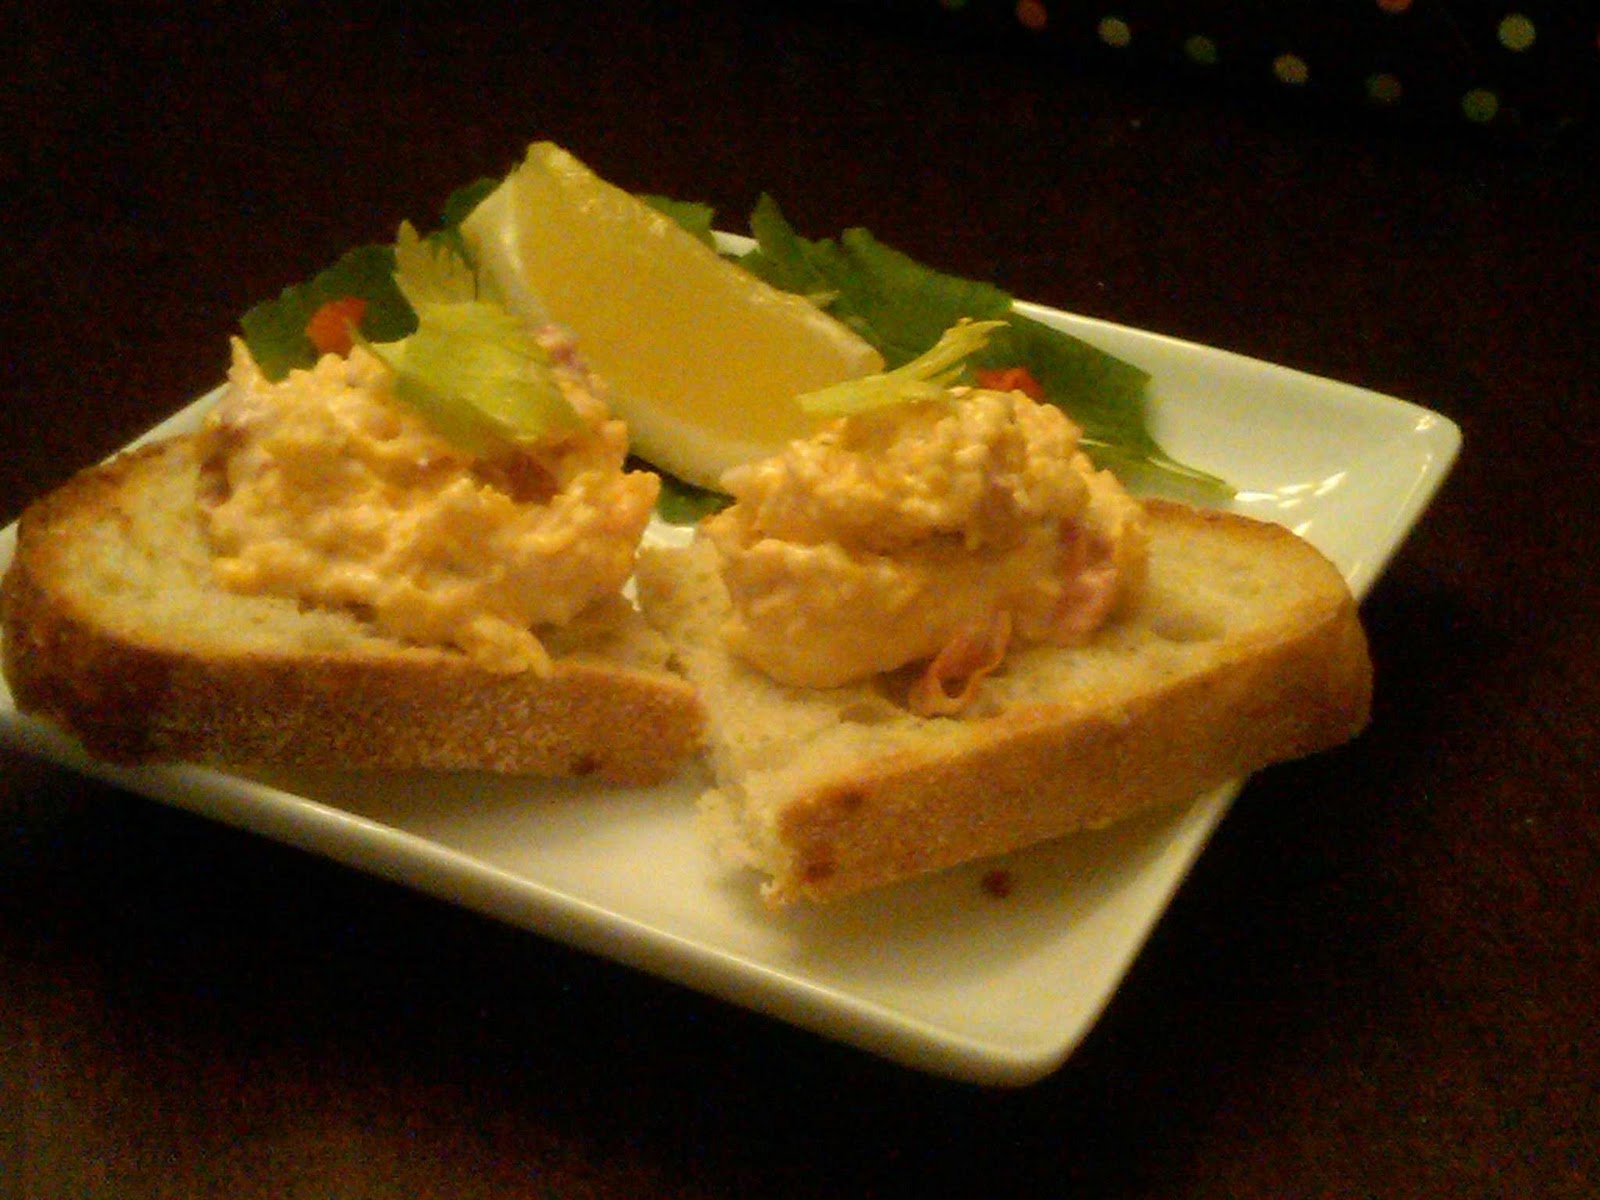
How to serve pimento cheese once it's made is a topic for several more posts, but you can get all fancy and spread it on little toast points (see glamor shot above), or just serve it in a bowl with some crackers around it, or--as usually ends up happening to me--simply leave it in a plastic container in the fridge and scoop out a couple of spoonfuls here and there until it's gone before you get a chance to serve it at any sort of gathering.

It's good stuff.


Sunday, March 14, 2010

Squashing Quail

I have a soft spot in my heart (and a subscription) for Garden & Gun magazine.  I know that it's a "lifestyle" magazine for a lifestyle that I'm quite a long way from embodying, but that's okay.  I like the pictures, and a lot of the articles, too.

My own tastes lean much more toward the garden than the gun.  The last animal I shot was a squirrel, and I was about 13, and it was with a BB gun, and the shot seemed to annoy the little guy rather than wounding him.  I can't conceive of paying $20,000 for a pearl-inlayed shotgun, though the things really are beautiful.  But, give me Robb Walsh writing about Gulf Coast oyster bars or P. J. Rourke and Roy Blount, Jr., writing about just about anything and I'm happy.

So, in the latest issue, there's a great looking braised quail recipe from Hugh Acheson of Athens's Five and Ten.  It particularly piqued my interest since Boone Hall Farms, which is about a half mile up the road from me, just started carrying whole quail and I've been looking for interesting things to do with it.  Scanning the ingredients list of Acheson's recipe (as reported by Francine Maroukian), I noted quail, sea salt, black pepper, leeks, and squash . . . wait . . . squash?

Upon closer inspection, the ingredient was not squash at all but rather "2 squash-ball-size yellow onions, peeled and halved."

Squash-ball sized?  It was like being in Toronto all of a sudden and trying to translate $3.75 Canadian dollars per liter to American dollars per gallon and figure out if it was a good price for gas.  How the hell big is a squash ball?  I know it's small--smaller than a tennis ball definitely, and, yes, probably smaller than a racquet ball, too.  I've seen golf-ball sized used a lot in recipes, but why would anyone choose to describe an onion as "squash-ball-size"?

Perplexed, I did a little research.

An official squash ball, as it turns out, is 40 millimeters in diameter, plus or minus .5 mm.    A United States Golf Association-approved golf ball, on the other hand, is up to 42.67mm in diameter.   I guess I have to admire the desire for precision in this recipe, for surely using an onion that is upwards of 2 mm too large might completely scotch the whole preparation, and, even if using a more common analogy like "golf ball" might make the recipe more accessible to the 99.8% of the population that's never seen a squash ball, you really don't want improperly-sized onions fouling up your braised quail.

But, "New South" measurements aside, it's a damn tasty looking recipe.

Friday, January 08, 2010

Corn Broth & Vegetable Medleys


Back during the summer, I was interviewing Mike Lata of FIG for a Charleston City Paper article on local restaurant trends, and he talked about this fish and shrimp succotash thing that had become a regular on the menu.  The base of the succotash was something I'd never tried using before: corn broth.  But, the triggerfish with shrimp succotash was so knock-your-socks-off good, I had to start experimenting with corn broth.  It wasn't long before I was boiling up a dozen corn cobs at a time and freezing it for future use.

I was further inspired by John Ondo down at Lana, whose roasted chicken served over a bed of sauteed vegetables led me to a brief period where just about everything I cooked at home ended up being layered atop a medley of five or more veggies.  The Wife, whose vegetable intake in any given month may consist solely of onion rings and the pickle from a cheeseburger, has accused me of trying to sneak a full bushel of vegetables into her diet--but even she isn't complaining, because it's so darn good.

The corn broth is simple to make: you simply carve the kernels off of anywhere from 2 to 12 ears of corn, reserving the kernels for cooking or freezing.  Put the corn cobs in a pot with a bunch of water--at least enough to cover the cobs--bring it to a boil, then reduce to a simmer.  Cover and simmer for about 30 minutes, then strain and put into storage containers for freezing.  Like chicken stock and duck fat, corn broth is a staple you should always have on hand in the freezer.

I need to come up with a snappier name than "vegetable medley", which sounds like something off the middle school lunchroom menu, but that's what it is.  The great thing about my corn broth preparation is that you can use it with just about any vegetables--whatever you see fresh at the store.   Usual suspects for mine: onions, zucchini, yellow squash, green beans, corn (of course), shallots, and limas.  One of my particular favorites are previously-cooked blackeyed peas, which I goose up with onions and Benton's bacon and simmer for 45 minutes in chicken stock and white wine.  I always make these in bulk, so there's usually a big tub of them in the freezer and I can thaw out a half cup or so to use in the medley, being sure to include several good chunks of bacon to add to the flavor.

The key is to precook anything that required more than a few minutes to cook.  So, for example, I would blanche the green beans and use pre-cooked corn and blackeyed peas and get them ready ahead of time.

One of the many good things about this preparation is that it doesn't take very long to finish off once you get started.  I'm usually serving something like pan-seared fish (flounder and trigger are good candidates) or roasted chicken over the veggies, so you can get the meat all ready and in its finishing state in the oven and kick off the final veggie prep.

For that, I melt a tablespoon (or two) of butter in a medium saucepan over medium-high heat and add in, say, the onions.  Once they are starting to get translucent, I throw in the tender stuff like squash and zucchini and give it a couple of minutes of sauteeing.  Then, all the pre-cooked stuff, tossing it around for a minute or two until it's good and heated up.  Then, pour over it all a splash of white wine, let it bubble away for a few seconds, then pour in a cup or so of corn broth.   The pan is good and hot at this point, so the broth bubbles up pretty quickly and starts to boil, but you're not trying to create a reduction sauce here.  I let it bubble for a minute or so, so that it starts to reduce just a bit but is still definitely thin and brothy, then pour they veggie mix (broth and all) into a wide, shallow bowl and lay over the top the night's fish or meat selection.

The secret to it all is the corn broth. It has a rich, delicate flavor that really lights up the vegetables and lays a perfect foundation for a fish or poultry dish.

This is one that now has a permanent place in my kitchen rotation.

Saturday, May 02, 2009

Holy crap . . . I cured salmon!


I got Michael Ruhlman's and Brian Polcyn's Charcuterie: The Craft of Salting, Smoking, and Curing as a Christmas gift, and I've been sort of dipping my toe slowly into the murky waters of the craft of salting and curing meats (as a dyed in the wool barbecue nut, I've had the smoking part down for a while).

About a week ago, I took a crack at curing salmon. I had totally not planned this ahead of time, so I didn't have any fresh fennel on hand, so I skipped Ruhlman's lead recipe (Fennel-Cured Salmon) and went with one of his alternates, a pastrami-style seasoning that includes a lot of black pepper and coriander.

Here's what I did:

Cracked and toasted the spices, then rubbed them along with a bunch of brown and white sugar and kosher salt all over the slab of Salmon:


Then, covered it with Saran Wrap and weighted it down with a hefty can of tomatoes:


Then, into the refrigerator for 48 hours. I turned it a few times and spooned the liquid (which it started to give up pretty quickly) and bits of brine over the fish.

Then, out of the pan, rinsed off all the brine, and wrapped it in waxed paper.
The results were quote remarkable--a rich, chewy texture and great flavors from all the spices. I simply sliced it as thin as I could with sharp, sharp knife and ate it by itself--just a little nibble each day while I was making dinner.

Ruhlman says it will last three weeks in the refrigerator. I don't know: mine was gone in about five days.

I just made a small bit--probably no more than half a pound--since I wasn't sure how it was going to turn out. Next time, I'm going to do a full filet.

Next up, after seeing some tantalizing pictures on Ruhlman's blog, I'm probably going to try my hand at a little duck prosciutto. Ted's Butcherblock always has some great duck breast on hand . . .

Sunday, April 26, 2009

Spring Radishes


Spring is here, and I'm suddenly consumed by a desire to eat vegetables, lots of vegetables.

Radishes, according to this handy SC Produce Availability Calendar, can be had almost year round, but I saw some particularly good looking radishes with their greens at Whole Foods and had to snap them up.

For the preparation, I went with simplicity in an attempt to recreate the radish appetizer at FIG, which still remains one of my most stunningly memorable vegetable eating experiences. I was fresh out of artisanal butter and fleur de sel, so I compensated a little by using coarse sea salt and a compound butter whipped up from plain old grocery store unsalted butter along with thinly sliced spring onions (from Boone Hall Farms), a squirt of lemon juice, black pepper, parsley, and dill.

Slice a piece of radish, slather it in the butter, and bite. Damn, that's good stuff. Fresh and just a little spicy and the richness of the butter is the perfect contrast. I've had that little salad three nights in a row.

Wednesday, November 12, 2008

Just Shillin', Food Network Style

Though I find most of the shows on the Food Network these days to be tedious and silly, I still regularly visit their website to look up recipes. I've always found it a much more reliable source than, say, Google to turn up a pretty good version of solid, made-from-scratch cooking. Part of this is because the Food Network once had quite a stable of cooks, including Mario Batali, Bobby Flay, Alton Brown, and--when he wasn't too busy bamming up everything in sight--Emeril Legasse.

So, imagine my surprise when I logged in the other day and found at the top of my search results a "Sponsored Recipe" provided by Kraft. The particular recipe in question was for "Simply Lasagna", and it required the following ingredients:


1 lb. ground beef
2-1/2 cups KRAFT Shredded Low-Moisture Part-Skim Mozzarella Cheese, divided
1 container (15 oz.) POLLY-O Natural Part Skim Ricotta Cheese
1/2 cup KRAFT Grated Parmesan Cheese, divided
1/4 cup chopped fresh parsley
1 egg, beaten
1 jar (26 oz.) spaghetti sauce
1 cup water
12 lasagna noodles, uncooked

This is precisely the kind of industrial food glop that I turned to the Food Network recipe search for in the first place.

Not to fear . . . I did turn up a fine Batali recipe for "Neapolitan Baked Lasagna" that I ended up using. It was from his show back in 2000. I figure it'll get purged from the database before too long to make way for more "sponsored" schlock.

Friday, June 06, 2008

Carolina Pilau


These days, as I've been looking more and more into the old-school classics of Lowcountry cooking, I find myself eating pilau a lot. In Charleston, that's usually pronounced "per-low" or "per-loo", but it is related historically to the Middle Eastern rice dishes that are more frequently called "pilaf" outside of Charleston. Made incorrectly, pilau can be a dry, boring rice dish. Put together just right, it's a tender, steamy delicacy. I can't say I've completely mastered the pilau yet, but I'm getting closer.

For this recipe, I started with the version from John Martin Taylor's Hoppin' John's Lowcountry Cooking, which I've found to be one of the best sources for classic Lowcountry recipes. One thing was noticably missing from Taylor's version, though: bacon. Bacon shows up in almost all of the 19th century pilau recipes from South Carolina, so I added in a slice or two once I hit the step where you sautee the vegetables (after all, bacon is essentially just an extension of the vegetable food group, right?)

Here's how it goes:

1. Cover a whole chicken (or the parts from one chicken) with water (about 2 quarts), bring to a boil, and simmer for a half hour.


2. Remove chicken from the stock and reserve the stock. Allow chicken to cool, then remove the meat from the bones.


3. Melt a bunch of butter in a dutch oven or similarly large pan. Don't be scared--used a whole stick.


4. Add a diced onion, 2-3 ribs worth of diced celery, and 2 slices worth of minced bacon. Cook till the vegetables are just starting to brown. (I snapped the photo below just before remembering I needed to add the bacon!)


5. Toss in a diced tomato along with salt and pepper and some fresh thyme (about a tablespoon if it's fresh, a teaspoon if you only have dried). Add two cups of rice and the chicken and stir till well coated in the butter. I prefer to use Carolina Gold rice for this dish, though you could use plain old long grain rice, too--it just won't have quite the dense, chewy texture of the original.


6. Add 4 cups of the reserved chicken stock. The ratio of rice to liquid is important here, so measure!


7. Bring to a boil, then reduce heat till the liquid is just simmering (medium low on my electric stove). Cover and cook undisturbed thirty minutes.


When it's done, remove the lid, fluff the grains of rice with a fork, and serve. It's rich and filling and a classic of the Lowcountry.

Monday, May 05, 2008

Resurrecting Hoppin' John, Part 1: Red Cowpeas


One of the classics of Lowcountry cooking is Hoppin' John. As much as I have heard people rave about it, I have to admit that for years I was utterly unimpressed. Most recipes these days say Hoppin' John is a mixture of black-eyed peas and rice. The versions I tried always seemed pretty bad--bland flavor, and a mushy texture. Even efforts to spruce it up a little with sausage or bacon or tomatoes didn't seem to help much. The end result was a gloppy gooey mess that left me wondering, "What were those old Lowcountry folks thinking?"

Now I'm starting to figure it out. It's a problem of ingredients. If you start with plain old white rice and a can of Bush's black-eyed peas, you will end up with Hoppin' Mush. To get the real deal, you need to use the right ingredients.

This entry is dedicated to the first of these ingredients: proper red cowpeas. Wikipedia may lump cowpeas and black-eyed peas in as the same thing, but they really are not. Carolina Plantation now grows classic cowpeas, and you can find them sold in white cotton bags at various grocery stores around town or pick them up online. They'll run you five or six bucks for a two pound bag, but it's worth shelling out for: these peas are nothing like blackeyes.

Red cowpeas are firmer than black-eyed peas and have a richer flavor--the only term I can come up with is "more meaty." Cook some up and you'll see what I mean. I've found there's a fine line when cooking with ordinary dried black-eyed peas: if you don't cook them long enough, they are still crunchy in the middle, which is awful. Cook them too long and they turn to mush. You don't have this problem with red cowpeas. Their texture holds up well, staying firm and chewy even with long, slow cooking.

Here's how I like to cook them:

1. Rinse 1 cup of cowpeas and soak in water for a few hours

2. Bring 3 cups of chicken stock to a boil

3. Add in the following:
  • half a cup of diced onion

  • 1 strip of good bacon, diced

  • the soaked peas


Lower heat and simmer for 45 minutes or an hour, till the beans are tender and the pot liquor is thick and flavorful.


These peas are so delicious you may decide there's no need to ever mix them with anything else. But, stay tuned for part two . . .

Sunday, March 30, 2008

U-Pick Strawberries


Yesterday we hit the U-pick strawberry patch out at Boone Hall.


Last night, it was Strawberry Cobbler for dessert. I had all the best intentions of doing up a big pie, but by the time I got into the kitchen it was already after six and I just wasn't up to rolling pie crust. This cobbler recipe is an old fallback that I got from Mark Bittman's How to Cook Everything, and he credits it to John Willoughby, who supposedly found it in a Southern boardinghouse. I call BS on that last bit since Willoughby isn't all that old, and have you heard of anyone staying in boardinghouses since the era of Thomas Wolfe? (I'd believe "bed-and-breakfast" . . .). Anyhow, it's a great, simple recipe, and i've made it time and again with fresh strawberries with great result.

You just slice the strawberries, toss them with sugar, and put them in a baking pan. For the crust, you cut a stick of butter into a half cup of flour in a food processor, then mix in an egg and a little vanilla, then drop the dough by the spoonful over the top of the strawberries. You can literally throw the thing together and have it in the oven in less than five minutes. 40 or 45 minutes at 375 degrees and you have a golden, crusty treat.


It's perfect with a scoop of ice cream over the top.

Monday, March 24, 2008

The Strawberries Are In!


Mike at Mike's Table is hosting "Strawberry Seduction", a blogging event calling for posts about recipe made with fresh strawberries. By some strange coincidence (call it, perhaps, the start of strawberry season), I recently became deeply interested in strawberries myself.

Every day as I drive to work I pass by the Boone Halls Farms fields out on Highway 17, and for weeks I've been watching the strawberry plants and looking for the little speckles of red to appear amid the green leaves. And the berries are now in.

I bought a big basket today and man, oh man, are they delicious. The best thing about freshly picked strawberries is not their sweetness--the winter varieties from Chile have that--but rather the crisp texture and tangy tartness that mixes perfectly with the sugars. And that is the true taste of spring.

The problem with strawberries is that they don't stay good for long, so I had to do something with them. And what I did was make ice cream:

1. Stem and slice about 3 cups worth of strawberries

2. Mix with 1/2 cup of sugar and 4T lemon juice and allow to macerate for at least an hour, until a good red liquid has been produced from the berries


3. Combine a cup and a half of whole milk with a 1/2 cup of sugar and blend with a mixer set to low for a couple of minutes.

4. Strain the strawberries, reserving the juice, and mash half of them with a potato masher.

5. Add the strawberry juice, mashed berries, 2 1/2 cps cream, and 1-1/2 tsp. vanilla to the milk and sugar and stir well.

6. Pour into your ice-cream make and churn as required until thick and creamy, about 20 minutes


7. Add the remaining berries and continue churning another five minutes or so.


The results are breathtaking. This is perhaps my favorite of all the homemade ice-creams I have made. Something about the fresh strawberry flavor and the rich cream just goes perfectly together. Proof positive that Spring has arrived in South Carolina.

Saturday, November 24, 2007

The Mimi Roll Wars, Round 2


I suspected there would be treachery, and I was right.

All families have their special Thanksgiving traditions. One of my family's is "Mimi rolls, " so-called because for years they were the special contribution of my grandmother, whom everyone calls "Mimi." These are puffy white yeast rolls made in a big pan and are as essential to my family's Thanksgiving as the turkey and stuffing. Brown and crispy on the outside and tender soft in the middle, they are the ideal accompaniment for Thanksgiving dinner and taste best when sopped full of gravy and cranberry sauce.

As time passed and the kids grew up and got married and had their own kids, the gathering has gotten larger (this year's totaled 37 people) and Mimi has gotten older. Her energy has faded with age, but her native German frugality has only strengenthed. About five years ago Mimi announced that instead of the traditional two pans of rolls she was making only one, which she calculated out to be one roll per person, which was "all that anyone needs, anyway."

This set off a minor crisis at the dinner buffet, as some in the front of the line weren't aware of the one-per-person rule and took more than their share and some in the back found themselves out of luck. There was grumbling and some accusations of roll-hogging. One uncle was rumored to have secured a small stash of rolls that he was selling to the highest bidder.

Clearly this wouldn't do, and the next year my mother and I hatched a plan to save Thanksgiving. She had gotten the recipe from Mimi several years before, and she passed it on to me, and we each made a pan of the rolls and snuck them into the kitchen and added them to the basket for the buffet. And a good thing, too--with the addition of another fiancee and a few boyfriends to the crowd, one pan wasn't even enough for one-each.

We kept this all on the QT, not wanting to offend Mimi. But, word got out pretty quickly that there had been some roll augmentation, and an aunt or brother-in-law would pull us off to the side and whisper, "Great job with those rolls . . . they taste just like Mimi's!" One cousin, who had tried to replicate Mimi rolls herself in the past and failed miserably, heaped praise upon us for being able to get the texture and shape just right. And this, of course, went straight to our heads.

Within a couple of years, Mimi--now in her nineties--stopped making the rolls altogether, and the torch has now been passed to my mother and me to supply the Thanksgiving staple. And somewhere along the way a relative heard about this and said, in passing, "we'll have to see whose rolls turn out better." And thus a competition ensued.

It's an unspoken competition. My mother would deny that she has even a single competitive bone in her body and could care less who thought whose rolls were better. But I know better, and I'm on to her tricks. Last year, The Wife caught her scrambling the rolls, taking the ones from her pan and mixing them in the big serving baskets with the ones I made, ensuring that no one would be able to compare the two. Clearly, my mother must have sampled the two batches in advance and determined that hers couldn't hold a candle to mine in a fair head-to-head taste test and undertook to ensure the match never took place.

This year there was more treachery. We moved houses over the summer, and when I went to make my batch of Mimi rolls Wednesday night I couldn't find my old handwritten recipe. So, I called my mother up and she read the ingredients out to me over the phone. "I don't even need to look it up," she told me. "I can do it from memory." And she rattled off the list of ingredients and their amounts. "I think I'm forgetting something," she said once finished. "Oh, let me look it up." A little rustling of paper, then a few seconds later. "An egg! That's it. Don't forget the egg."

A clever piece of gamesmanship on her part, the I-almost-forgot-the-egg thing. I followed the recipe as I had written it down--mixing up the dough and kneading it and putting it into a bread bowl to rise. As I was covering it with a towel I had a sneaking suspicion I was missing something . . . and then it hit me: yeast! I'd been following the directions just as she gave them to me and not using my brain, and I'd completely forgotten that risen bread requires yeast. Fortunately, I'd remembered in time. I dumped the dead dough ball into the trash and started over, this time adding in the two packets of yeast that she had so conveniently omitted from the recipe.

They came out perfectly, and Thankgiving went off without a hitch. Better luck next year, Mom.

Here, for posterity's sake and to keep me from being at the mercy of my mother the next time I can't find the hand-scrawled instructions, is the recipe for Mimi Rolls:

Mimi Rolls

2 cups milk
4 T butter
4 T sugar
2 t salt
2 eggs
2 packages rapid-rise yeast
7 - 8 cups of flour

These are all the ingredients, as far as I'm telling

Put the milk in a saucepan and scald it over high heat, removing it from the heat just as it begins to get bubbly but before it starts to boil (watch carefully--it will foam up out of the pot in a flash once it hits the boiling point). Add in the butter, sugar, and salt and stir till melted and dissolved. Allow the milk to cool until it is between 120 and 130 degrees F. You could just let it sit on the counter for a while, I usually speed this up by putting the saucepan in an icebath and stirring it while measuring with an instant read thermometer. Doesn't take but a minute or two to get it to 130 this way.

Combine 4 cups of the flour with the yeast (don't forget the yeast!) in a large mixing bowl, make a well in the middle, and pour in the liquid. Add the two eggs. Stir with a wooden spoon until the liquid is all absorbed, then start adding more flour a half cup at a time until the mixture is too stiff to stir. Lose the spoon and knead the dough by hand, working in the remainging flour until the dough has a smooth, elastic consistency. Knead another five to ten minutes, then form the dough into a ball, cover the bowl with a towel, and let it rise an hour or so until it has about doubled in size.

Up to this point it's a pretty conventional yeast roll recipe. The trick to Mimi Rolls (according to everyone who has tried to make them) is shaping them correctly. I've never seemed to have much problem with it, but it has done in many a cousin who tried to reproduce Mimi's originals. Here's how I pull it off:

Once the dough has risen, pinch off a large blob about the size of a golf ball. Knead the blob between your hands a few times until it feels soft and pliable. Take the ball with both hands and poke your fingers into one side, then turn the dough inside out on itself. Place the dough between your palms and roll it back and forth until you've shaped it into a smooth, cigar-like cylinder. Place the dough roll into a large Pyrex baking pan and repeat. When you are done, you'll have a pan filled with two rows of little dough cylinders. Cover with a towel and let rise until about doubled again.

Bake in a 375-degree oven until golden brown on top, about 20 - 25 minutes. Remove from the oven, brush the tops with melted butter, and allow to cool on a baking rack.

It wouldn't be Thanksgiving without them.

Saturday, November 17, 2007

Shrimp n' Grits


I recently observed that you can't swing a cat in a Charleston restaurant without hitting a plate of fried green tomatoes. If this is not literally true, it's only because you'd hit a bowl of shrimp and grits first. In the past twenty years, the classics of "Lowcountry cuisine" have been officially canonized on the menus of local restaurants, and shrimp-and-grits tops the list. Like fried green tomatoes, though, shrimp and grits are a relatively recent newcomer to the fine-dining scene--especially in their current incarnations.

Fried green tomatoes achieved a bogus status as a Southern classic due to the movie version of Fanny Flagg's novel, but the pedigree of shrimp and grits is a little more genuine. Quite likely, shrimp-and-grits have been eaten in the Lowcountry of South Carolina for centuries. It's just that until the 1990s nobody made a big deal about them, you couldn't find them in restaurants, and they were really less a "dish" than two things served together, like ham and eggs or chicken and rice.

I did some digging but couldn't turn up any old recipes for shrimp and grits together nor even any references to them in diaries or journals. The best I could find were some recent food writers who look back to shrimp and grits as a breakfast dish. For example, John Martin Taylor writes in his Hoppin' John's Lowcounctry Cooking"Until recently families all over the Lowcountry partook of 'breakfast shrimp,' as the dish is often called, every morning during shrimp season." No one ever explains why people stopped eating breakfast shrimp, but I've never seen it served for breakfast in anyone's home here in Charleston (on restaurants' brunch menus, yes, but not in an actual home).

So how did shrimp-and-grits become the iconic Lowcountry dish? Abe Grant, who ran Abe's Shrimp House on Hilton Head Island from 1968 until 2000, claims to be the first person to put shrimp and grits on a restaurant menu, and from what I can tell he might be right. But, it was a few Charleston restauranteurs who seem to have put it on the culinary map.

When Donald Barickman opened Magnolia's in downtown Charleston in July 1990, he made the unusual choice to serve not French or Italian cooking--as most of the city's high-end restaurants did--but rather "Southern cuisine", focusing the menu on traditional regional foods such as collard greens and grits, the latter of which he called "the almost forgotten staple of the South". Barickman is often credited with sparking the "New South" culinary movement that took ingredients and recipes formerly found only in meat-and-threes and local home kitchens and putting them on the white tablecloths of upscale restaurants.

His version of shrimp and grits includes shrimp sauteed with chicken stock and Italian sausage and served over stone-ground grits cooked in chicken broth and cream, all of which is topped by a spicy Tasso ham gravy, and this style of preparation has become standard not only in the Lowcountry but throughout the South. Barickman wasn't alone in introducing shrimp-and-grits to the fine dining world--82 Queen was serving them at least as far back as 1992--but he was certainly one of the first.

So, shrimp-and-grits may not be a total newcomer on the scene, but it went uptown only in early 1990s--about the same time that fried green tomatoes became such a hit. In my mind, though, there's a huge distinction between fried green tomatoes and shrimp and grits that you have to take into account: shrimp and grits are really, really tasty, while fried green tomatoes are just plain awful.

Now, if there is such a thing as old-school shrimp and grits, it would probably be just sauteed small shrimp served over grits made in plain old salted water, with maybe a little butter or onions to flavor things up. The New Southern style gussies things up by adding lots of cream, butter, and/or cheese to the grits and serving the shrimp in a thick, spicy sauce or gravy. Barickman's version, which comes with a tasso gravy, is less a true Lowcountry dish than a fusion of ingredients from different parts of the South prepared with modern restaurant cooking techniques. Tasso is a highly spiced smoked pork shoulder and a Cajun specialty. Shrimp is definitely a Lowcountry classic, but rice was the staple Charleston grain. Grits is more properly a backcountry food, and the New Southern style of preparation is more akin to polenta than what you'd find in Grandma's kitchen.

But that's no strike against it, in my mind. I've been a fan of New Southern style shrimp and grits ever since I first had them (which, if I recall correctly, was at Mr. Friendly's New Southen Cafe up in Columbia sometime in the mid-1990s), and I've spent quite a bit of energy learning to duplicate the various recipes at home. If you want to make shrimp and grits the way Charleston restaurants do, there are a couple of things you need to do:

1. Use fresh shrimp. Interestingly enough, the old breakfast shrimp recipes were for "creek shrimp"--the small, sweet shrimp caught in marshes and creeks. Most restaurants, though, go for the jumbo variety, butterflied down the middle before sauteeing, which makes for a more dramatic presentation.

2. Never, ever use quick or instant grits. Part of the success in the revival of grits in New South cooking is that the chefs wised up and realized that coarse, stone-ground grits are a thing of wonder. Instant grits made with water, on the other hand, are only slightly removed from eating wallpaper paste (and might, in fact, serve as an effective subsitute in a pinch.) Old fashioned stone ground grits used to be nigh-on impossible to find in stores, but most grocery stores in the area now carry them (though you often have to look on the specialty item shelves to find them). There are plenty of places where you can order them online, too, like here and here.

3. Cook the grits in stock, cream, or both. Good grits cooked in water are fairly tasty, but stock and/or cream give them extra richness and help win over converts who think they don't like grits because they've only had the Jim Dandy variety. You can add cheese to the grits, too, but with all the shrimp and sauce I don't think it's necessary.

From here, it's pretty hard to go wrong, and there are a thousand different variations. Here's my most recent favorite version, based loosely on Donald Barickman's recipe from Magnolia's:

For the grits:
1 cp milk
1 cp chicken stock
2/3 cp good stone ground grits
salt & pepper

For the tasso gravy:
2 T butter
2 T flour
1/4 cp diced tasso
1 cp chicken stock
salt & pepper

For the shrimp:
1/2 pound large shrimp, peeled and deveined
2 cloves garlic, minced
1 T parsley, minced
salt & pepper
1/2 glass white wine


Like most of my recipes, this makes just 2 servings.

Start with the grits first. Combine the milk and chicken stock in a saucepan and bring to a boil. Watch the pot carefully! Milk goes from nothing to a big foamy overflow in about three seconds flat when it hits the boiling point. At the first sign of foaming up, remove the pot from the stove and stir in the grits. Return to the heat and cook over medium-low to medium, keeping the liquic at just a simmer. Stir occassionally and add more liquid if necessary, cooking til the grits are soft and creamy--about 20 minutes or so.

While the grits cook, make the tasso gravy. Melt the butter in a saucepan, then add the diced tasso and sautee a minute or two over medium heat until slightly browned. Add the flour and make a roux, stirring occassionally till light brown, about 5 minutes. Add in the chicken stock, stirring constantly until the flour is fully incorporated and the stock starts to thicken, then reduce heat and simmer for 15 to 20 minutes. Add salt and pepper to taste towards the end.

Last is the shrimp. Heat a frying pan over medium-high heat and add in a tablespoon or so of olive oil. Add the shrimp, garlic, parsley, and spices and sautee, tossing the pan frequently to keep the shrimp cooking evenly, till the shrimp is pink all the way through and just beginning to brown around the edges--usually 2 or three minutes is all you need. Deglaze the pan with 1/2 glass of white wine.

To serve, place a large helping of grits in the middle of a plate or shallow bowl, spoon over the shrimp, and spoon a generous portion of tasso gravy over the top.

It may not be an old Carolina classic, but it's a new one, at least.

Sunday, November 04, 2007

Pickled Red Onions


Most of my favorite recipes are things I came up with trying to replicate something I ate at one restaurant or another. These onions are my version of a sweet, crispy garnish I had at an otherwise forgettable Mexican restaurant during my California trip.

A snap to make: thinly slice 1 large red onion (or two small ones) and 1 small green chile (I used a mild green one, but you could use anything from a bell pepper to a jalapeno depending on your heat preference). Combine 1 cup of white vinegar with a half cup of sugar in a saucepan and bring to a boil. Stir until sugar is dissolved, them remove from the heat. Put the onion and chile in a plastic container and pour over the liquid. Refrigerate until chilled.

As the brine pickles the onions, the red coloring mutes to a beautiful pink and the sharpness of the onion is dampened. These would go great on a sandwich or to brighten up tacos or enchiladas, but I've ended up just eating these straight from the container as a little cocktail snack during the afternoon.

Friday, September 21, 2007

Chicken Under a Brick


One of my all-time favorite chicken dishes is Chicken Under a Brick, which is also known by its Italian name pollo al mattone. I'd never tried making it on the grill before, even though that is how the classic Tuscan version is traditionally cooked. My old faux-Webber kettle grill would never had stood the weight of the brick, particularly after one of the legs broke free from the rusted-out kettle bottom and turned the whole thing into a perilously-shaky contraption. Instead, I always made it inside using the stove and oven and a couple of cast iron skillets, until a combination of poor kitchen ventilation and an overly-sensitive smoke detector made it an off-limits recipe.

My new house has a similarly inadequate stove fan, but no matter. My fancy new barbecue grill with its cast-iron cooking grates is ideal for chicken-under-a-brick, as I confirmed last night. Here's my old favorite recipe, updated to use a grill rather than the stovetop:


1 whole chicken
2 tsp Kosher salt
1-2 cloves minced garlic
1 Tbsp minced rosemary
olive oil

First you have to prep the chicken by removing the backbone and splitting it so it will lay flat. To do this, use a sharp knife to cut along either side of the backbone from front to rear, removing it as a single 1- to 2-inch wide strip. Then, spread the chicken out flat in a large baking dish or similar pan.


In a small bowl, mix about 1 Tbsp olive oil with the salt, garlic, and rosemary, then rub the mixture all over the chicken--both the skin-side and the inside. Put the chicken in the fridge and let it marinate while you prep the grill.


Fire up the grill and prepare a large batch of charcoal. When it's ready, spread the coals, rub a little oil on the cooking grates, and place the chicken, skin side down, on the grill. Weight down the chicken with something good and heavy. I took a small concrete paving stone from the border around my flower garden and wrapped it twice in aluminum foil (much easier than trying to scrub the thing clean.) Place the weight directly on top of the chicken to flatten it out and keep it compressed while it cooks.


Cook the chicken at least 15 minutes skin-side down then, using a thick towel or oven mitts, remove the weight, flip the chicken over, and re-weight it. Let it go for another 15 minutes or so, then flip it again and finish it skin side down. This should take no more than 10 minutes, but, to be certain, pierce the thick part of the leg and make sure the juices run clear.

You can eat it straight off the grill or let it rest for up to 30 minutes.

I'm not sure of the mechanics of it, but cooking the chicken under the heavy weight seems to keep it moist and juicy inside while ensuring a fantastic crispy skin. We ate ours with a tasty pear-and-blue cheese salad and some roasted potatoes, and enjoyed spending a little time catching up with this old friend. From now forward, this will be an outdoor dish for me.

Wednesday, September 19, 2007

Duck Fat


I picked up a pound of frozen duck fat at Ted's Butcherblock on Saturday. This may sound like a rather mundane event, but for me it was an important step forward. I've been meaning to go out and get my hands on some good duck fat for months, but for one reason or another I never seem to think about driving down to Ted's until it's Sunday afternoon, and the shop is closed on Sundays.

This past Saturday I finally managed to make it by, and this purchase has now allowed me to perfect the art of roasting potatoes.


For years roasted potatoes have been one of my absolute favorite side items. I make them at least once a week, and they go so well with so many different entrees, from basic roasted chicken to veal marsala to braised pork chops. Recently I've been tinkering with my old favorite recipe--nothing radical, just a few slight variations that make a great dish even better.

The key changes? Slice the potatoes thinner and cook them a little hotter. Rather than cutting the potatoes into inch-thick chunks (which usually meant quartering small baby red potatoes), I now cut them into about 1/2 inch slices. And now the most important improvement of all: roast them in duck fat.

The rest of the prep is simple--drizzle with about two tablespoons of melted duck fat, then sprinkle with salt, pepper, paprika, and chopped parsely. Lately, I've been roasting them at 425 degrees (rather than 350 degrees), and I stir and turn them more often--about once every ten minutes (I use my kitchen timer to remind me.)

I don't know what it is about the duck fat that adds so much to the potatoes, but they seem to come out just a little crispier and a little more tender on the inside and with a great punch of flavor that you don't get with olive oil or even chicken fat. Magnificence.

Wednesday, August 29, 2007

Simple Tomato Salad (Again)


Andrea over at Andrea's Recipes has created the "Grow Your Own" event for bloggers to post about their favorite dishes using one or more ingredients grown either in their own gardens or acquired as gifts from someone else's garden. In my case, that ingredient would be tomatoes which, unfortunately, I don't grow in my own garden but am still lucky to receive as regular gift from my father, who's been growing tomatoes in his backyard for as long as I can remember.


I've written about this recipe in the past, but it's so good that it bears repeating, especially considering I make it at least once a week for as long as tomatoes are in season. It's my favorite kind of salad--one that dispenses with the idle fluff of greens and cuts straight to the good stuff.

Start with an equal number of fresh tomatoes and hardboiled eggs. Slice the tomatoes about an inch thick and place on a flat serving dish. Sprinkle liberally with kosher salt and black pepper. Slice the eggs and place one piece atop each tomato slice. For the dressing, whisk together olive oil with vinegar, dijon mustard, and a little honey. Drizzle the dressing over the tomatoes, toss ver some chopped parsely, and serve.

With good, fresh homegrown tomatoes, this one can't be beat.

Popular Posts